
MINIDOODLE CUSTOM MINIBIKE SPIRIT
OK, all my friends out there. Here is what some of you have been waiting for. This is my project custom designed and built to celebrate the year of the mini bike.
So here is the story.
The main objective was to build a simple basic mini bike using every day materials and parts. I wanted it to be light weight, did not to do any welding or bending tubing, use basic home tools and be cheap.( Yah everyone likes the word cheap.) I"m calling this mini bike the "Spirit". It took me 7 months to build starting September 2003 and finally finishing March 2004.
All Copyrights belong to minidoodle minibike.
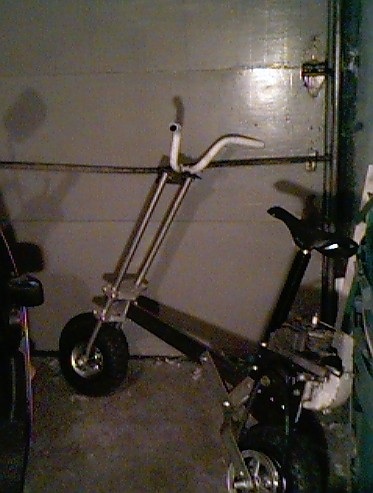
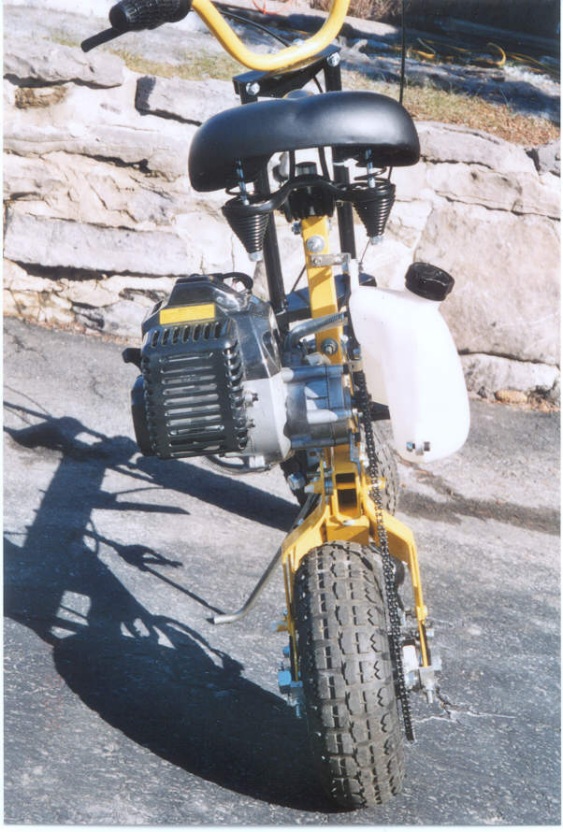
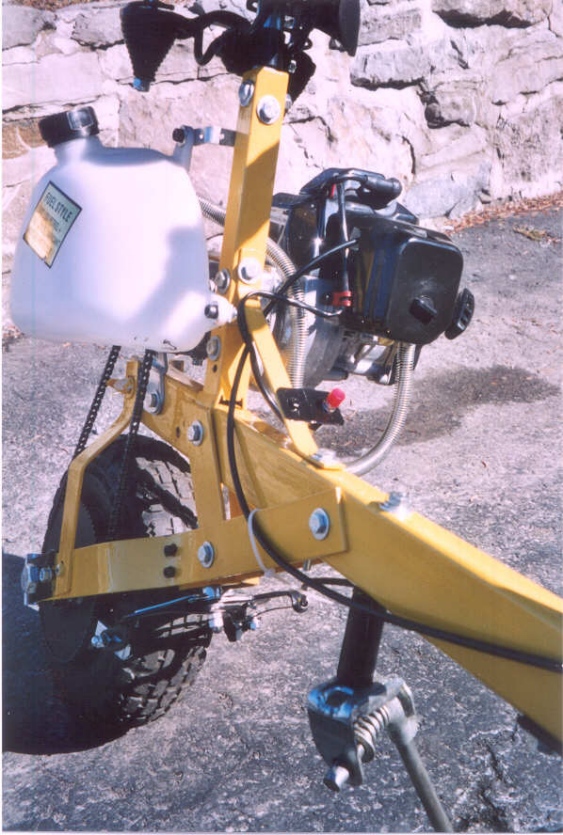
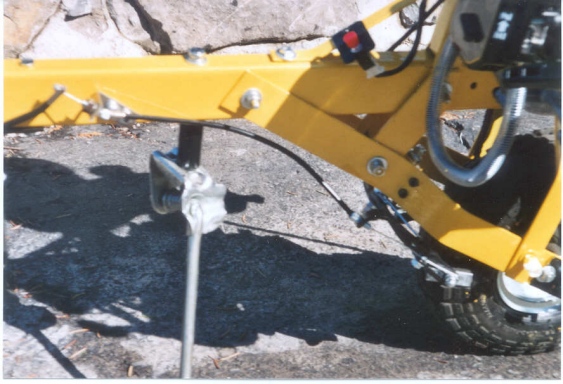
In the pictures below you will see the basic assembly of the mini bike. For the main beam I used a 1" x 2" rectangular steel tubing. The front fork was made from 3/4 electrical tubing. The rear fork was made from 1 1/2" flat bar. The Triple Tee was made out of aluminum. The handle bars came off my daughters bike. (OK I know what your thinking, but she got a new bike) The wheels are 10"diameter and cost about $10.00 each at northerntool.com. (Search pneumatc wheels) A hub had to be made for the mounting of the rear sprocket. The chain and sprocket size was 1/4 pitch, really small. The wheels are made for low speed max. 20 mph. The stand is from a 26" bike.The throttle was given to me by a good friend. The cables were made from bicycle cables. I used bicycle caliper brakes for the front and rear.
Just to mention I had no drawings to work with. So this was a trial and error approach. ( It is a lot easier to work with drawings)
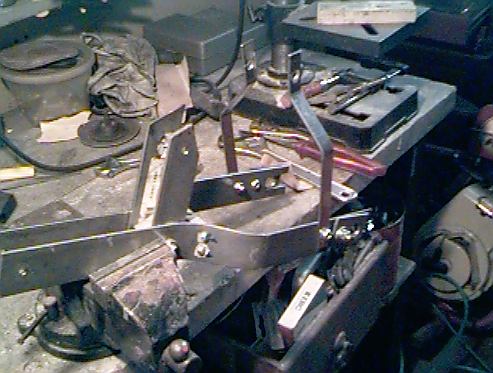
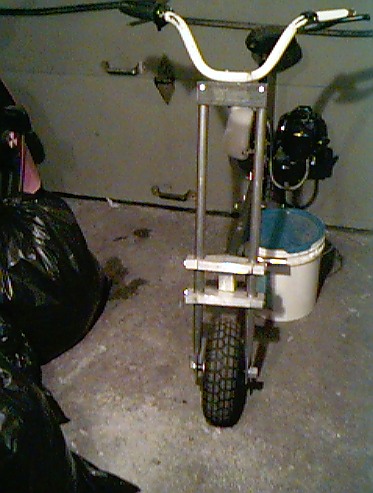
The original engine I had, it was a Tecumseh 3 hp 2-stroke. The engine was lying around in my shed for 30 years. I cleaned her up and added a carb and gas tank from a B & S lawn mower engine. I put a belt clutch on the engine and put a pulley on the rear wheel. But I had to make a hub to mount the pulley on the wheel. The engine ran very well, until the connecting rod broke. Since the engine was old and parts were very expensive, I decided to look around for another engine like the one I had. No such luck. So off to ebay I went and I got a ZOOMA 22 cc 1.2 hp, 2-stroke engine brand new with the clutch, transmission, gas tank and sprocket. The difficult thing was the engine mount was made for the old engine and had to modify the frame and make a new mounting bracket for the new engine. As the months went on, I was making a lot of progress. I got an old bicycle seat so that I could test the mini and size it. Below shows you how the back fork looked when it was built. Don't mind the messy work bench.
Below is the mini assembled and just about complete.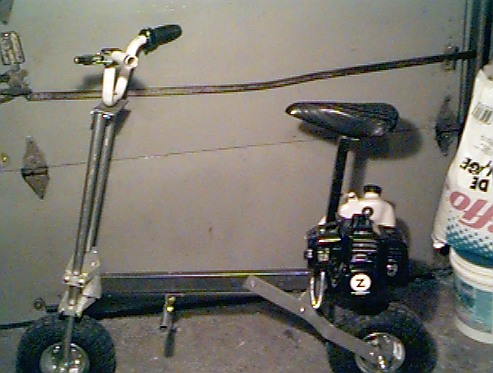
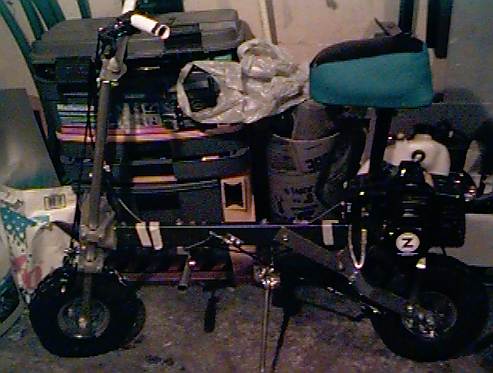
Below is a seat I tried to make. I did not like it, so I bought a springer as you will see in the final pictures.
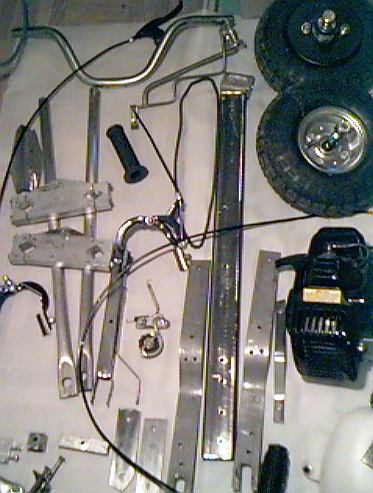
Once I got everything together I disassembled the whole mini. Below are all the parts ready to be painted.
OK now lets see what the finish product looks like.
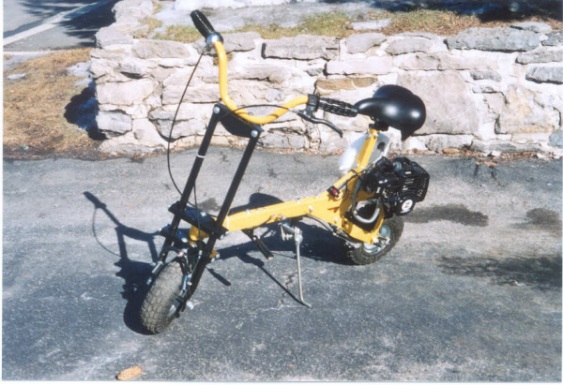
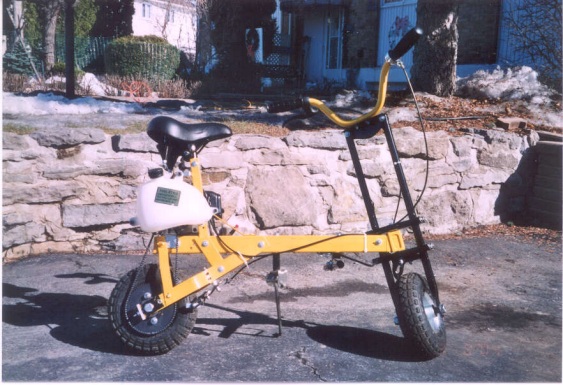
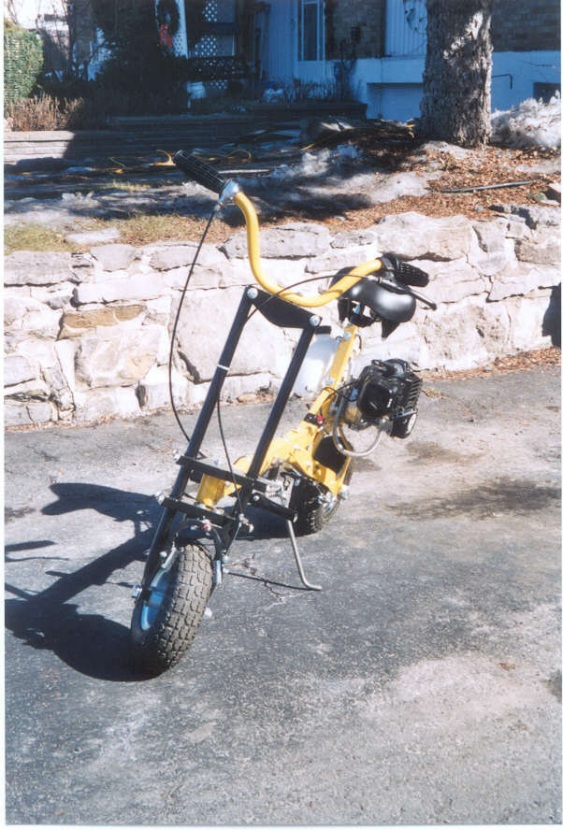
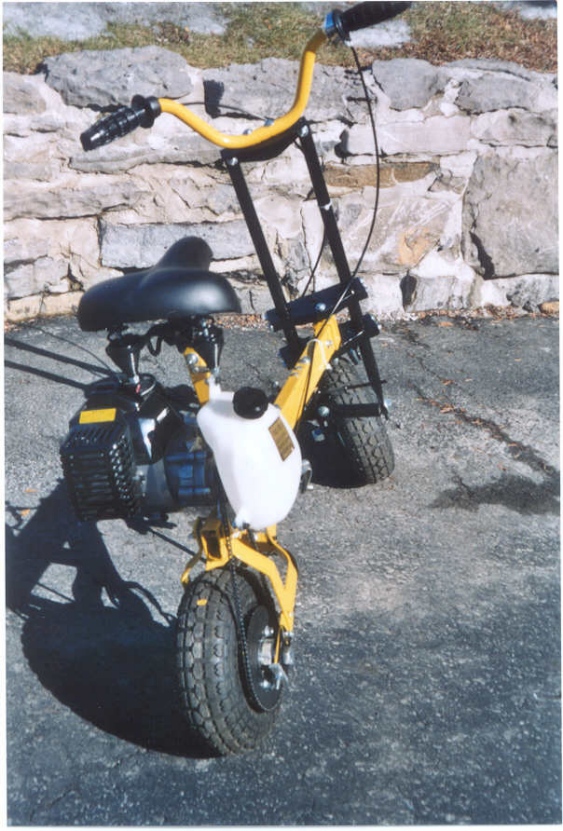
So this is it. The design is a cross between a mini bike and a scooter. The step through when mounting and getting off the bike. The total cost to build this mini bike is about $300.00 if you purchase all the parts new. And I would estimate with part drawing it would take about 3-weeks to build. First time riding this mini took a little practice. Since this mini has a high center of gravity and small wheels, balancing takes time to get used to. Once you get the feel of it, she runs smooth. When I designed the mini I wanted the frame high so you could go over rocks without hitting the frame. ( This was a problem with the early minibikes and some of the new ones). The mini bike seat height is 28" from the ground so adults can ride comfortably. Handle bars are 35" high and the total length is 42" just to give you an idea of size. The weight is 40 lbs. It is pretty big.Top speed is approx. 15-17 mph. It is not fast but you enjoy the ride. This way if your daughter or wife is afraid to ride, this mini is just for them. It would also be a good pit bike or something to go around the campground or private property. Mini bikes are fun and hope that this will inspire others to build there own. I still have decals and reflectors to put on.
The basic tools that I used to build this mini bike.
Drill press and hand drill,good set of drills, bench vice, hack saw, vice grips, jig saw, sander, files, pipe cutter and the most important a hand grinder. You can also cut the material with the correct disk. To speed up the work I recommend a band saw.
Watch this mini in action.
Click on movie below!!!
Leave comments I would like to know what you think or if you have any questions send me an email. Don't be afraid I don't bite.

!!!!!!! IT'S SOLD !!!!!!!!
CHECK OUT THE BANNERS BELOW!!
Here is an amazing web site. Northerntool.com
Look under go-cart for mini bike parts.
Easy Payment, Sign up to Paypal it's Free and Easy!!
