minidoodle.com | home
SMALL PROJECTS | BROCHURES ADS | RESTORING TIPS | FAVORITE LINKS | MINI BIKE PICTURES | Scooter Pictures | Moped Pictures | Honda Aero 50 Scooter | MANUALS | MINI BIKE PARTS PAGE | DREAM TOOLS PAGE

Honda Aero 50 Scooter

Looking for Honda Aero 50, 80, 125 parts and for many other brand name scooters? An excellent place to buy parts. They even have part diagrams. They also carry Suzuki, Yamaha and Kawsaki parts too,
BikeBandit below!!
Bike Specs Page (Click Here)
'85-87 Manual (Click Here) Now available on CD!!!
VIN LOCATION ON THE SCOOTER (Click Here)
Picture Ad (Click Here)
Windshield Plans (Click Here) See the pictures at the bottom of the page.
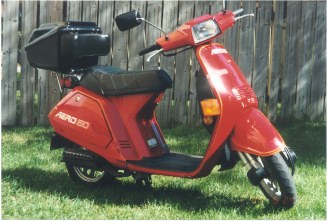
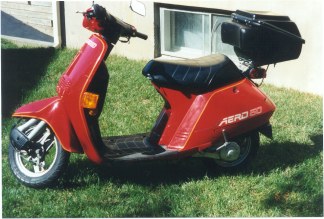
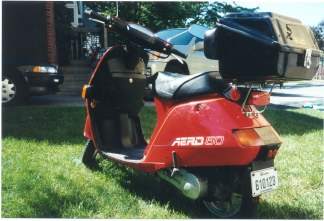
My new project. Below is the pictures of the 1986 Honda Aero 50 Scooter which I purchased recently. As you see it is in good condition. It has electric start as well as a kick start which was not on the earlier scooters depending where you live. The engine is a 49cc 2- stroke air cooled engine approx 3 hp. with an automatic transmission. Oil and gas is mixed autmatically. So far top speed is approx. 45 km/hr or 28 mph when I got the scooter. The scooter is smooth running and a lot of fun to ride. So far I have been cleaning the bike and doing small repairs to the plastic parts. Maximum rider weight is 190 lb... But it can take a person 250 lb.. What's also nice is you can be 14 and ride this scooter on the street.
UPDATE: By cleaning the carb., changing plug and air filter and burning out the carbon out of the muffler the scooter was able to go 60 km/hr. (40 mph.)
Update: When I bought the scooter it had 2264 km on the speedometer. I now have almost 7000 km. This is one heck of a tough scooter. It will take off at a stand still and leave the cars behind.The handling is really good and usually starts on the first or second kick when used everyday. If not used for a while it takes a couple more to get her going. This seems to be a flaw with the design of the carb. But no doubt she will start up once the fuel gets into the carb. What I love about this scooter is the younger crowd looking it over. The only bike yet that has over taken me is the Yamaha BWS. It is not at the start off, it is at the top end speed. But on the other hand it is stock with no hi performance parts. I recently added a windshield. The strange thing about this, is you get a vacuum when riding, with very little wind resistance. Took me a while to get used to this. The good part about the windshield it keep the bugs out of my face (see pictures at the bottom of the page). It is the classic design and is comfortable to ride as well it is well balanced. If you happen to see one for sell, jump on it because the newer scooter in my opinion lacks this quality.
UPDATE: Nov. 11, 2007
The engine rebuild:
As you can see below this update on the big bore kit I installed 2-years ago, my crankshaft broke just where the drive gear nut rests against the drive gear. With so much miles on the engine and the pressure of the racing speed variator, the bearings could not take it any more. I tried to repair the crank several times, but the weld would not hold. So in September I decided to rebuild the whole engine. When I did take apart the engine, there was a lot of damage. The bearings were shot, the crankshaft broken, the plastic fan got damaged and I needed a new drive gear. Thanks to some very good friends, I was lucky to get the parts cheaper. As you will see in the pictures below, the plastic fan and drive gear was from a 1985 Honda Aero Scooter that I purchased from ebay. They are used but in new condition. The crankshaft is brand new for a 1987 Honda Honda Aero. And as you can see the 2 new end bearings.
Taking apart the engine, you must first remove the complete engine from the frame. 2 bolts holds the engine. But first remove the muffler, rear wheel. Once this is done, remove the carb, carb manifold electrical wires and brake cable. Remove the one bolt on the frame and the other on the rear shock. Now you can work on the engine on the bench. Carefully removing the parts from the engine, I placed them in a large box so not to lose anything. Splitting the crankcase took a little bit of time because the main bearings are press fit. With the right tools it is a piece of cake. When assembling the bearings onto the crankcase, you will need a good press to press the new main bearings back in crankcase housing. In the pictures below you can see there is quite a bit of work. But it is well worth it. After getting it up an running, it runs great. I put 40 miles on it but did not want to take it over 45-50 mph. It is now stored for the winter and I can't wait to ride next summer.
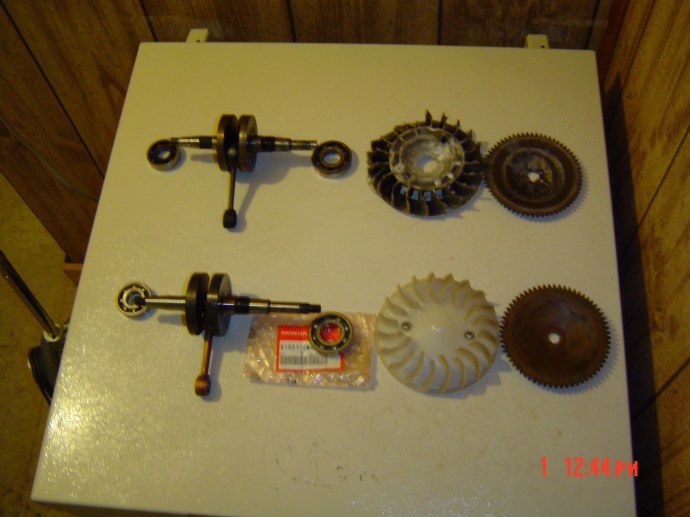
The picture above is the old parts at the top and the new parts showing at the bottom.
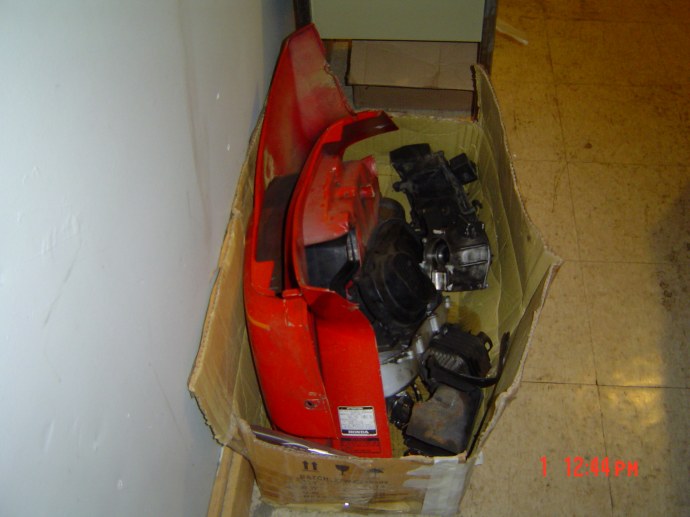
Picture above showing all the parts in a box not to lose any.
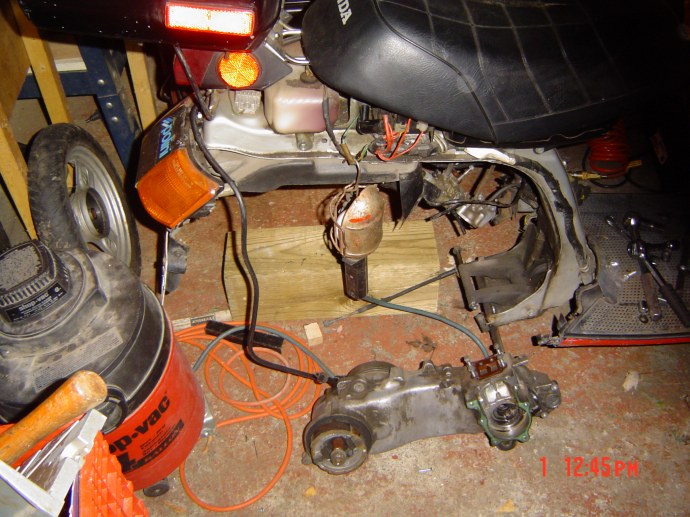
The above picture you can see the crancase and the scooter frame.
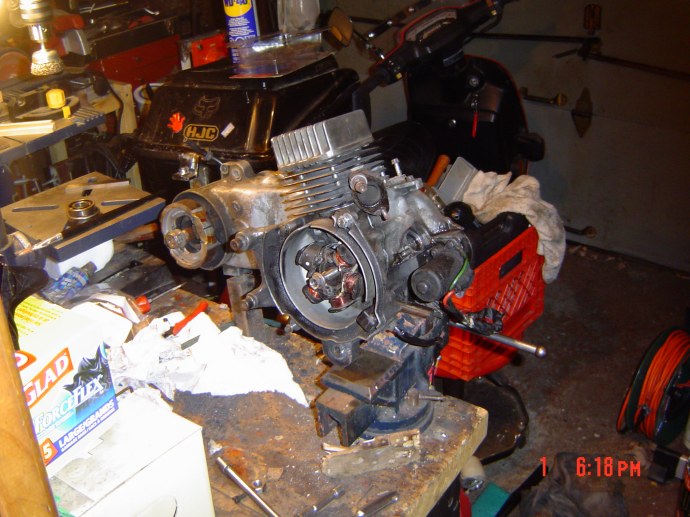
The above picture is the engine being assembled( the stator side view)
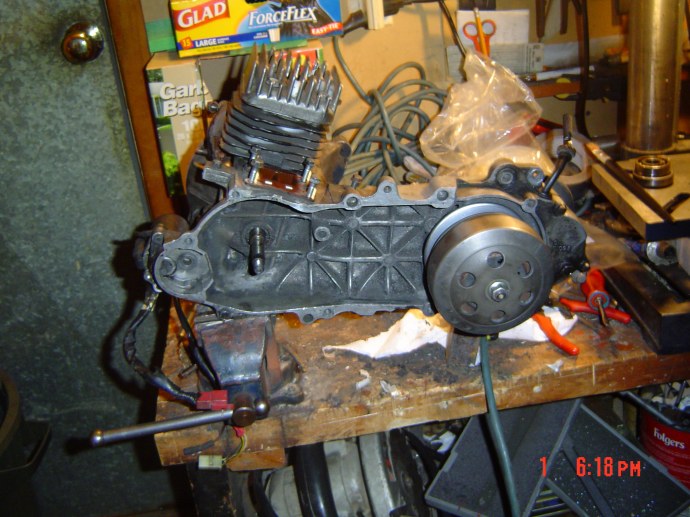
The above picture of the engine being assemble (Drive side view)
One very good piece of advice, do not attempt to do a job like this if you do not have the service manual.
UPDATE: Dec.12, 2004.
Well this summer was fun riding, but in September 2004, I could not start up the scooter. I could not understand why. Well I put it into the garage until October when I had a little time to check out why. Well I discovered the problem, at first I cleaned out the carb, then I removed the muffler and I found that it broke at the pipe just before the muffler. Well I said to myself, simple repair, just get it welded together. But because I was this far, I decided to take the head off and check out the cylinder. To my disappointment I saw a scratch all the way down the cylinder wall. I was very upset about this. Well the challenge began. I searched all over the place to get new parts. I could not find any. So off to ebay I went, there I found the Big bore kit for the scooter. I really did not want to go for this, but a scooter is worth more alive than dead. So I purchased it. It took one week to ship. I spent 3-weeks rebuilding the complete scooter. On DEC, 5th was the big day. I started up the Honda Aero 50 and it ran really well but tight. I let it sit for 15 minutes at idle and then took it out for a short run. Because the engine was rebuilt, I was gentle with the throttle. There is a break in period of 500 km (320 miles) This is very important if you want to keep the engine in good shape. So now my Aero 50 is now a 70 cc. Pictures posted below of the work done.
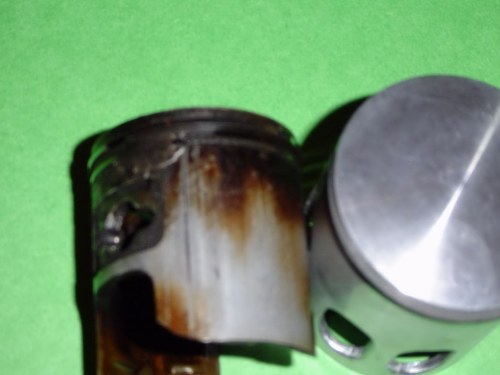
Below is the old damaged piston where you can see the scratch.
Below is the picture of the old cylinder with the scratch on the left side of the port.

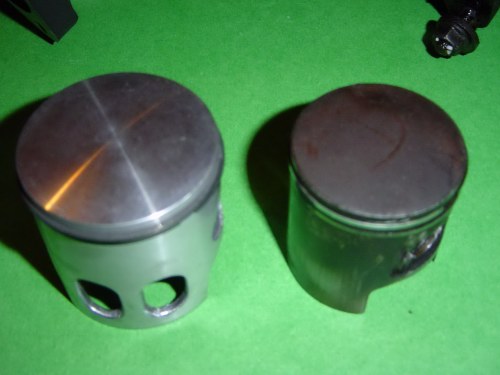
Below is the new 70 cc piston and the old 50 cc piston. Quiet a difference in size.
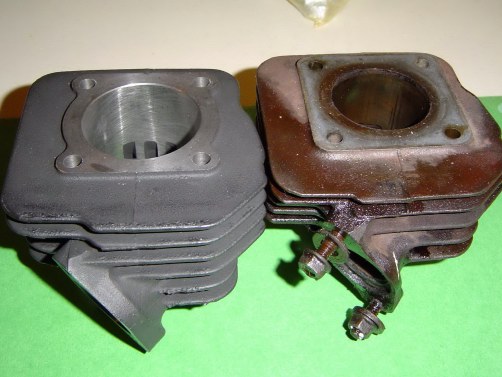
Below is the new and old cylinder.
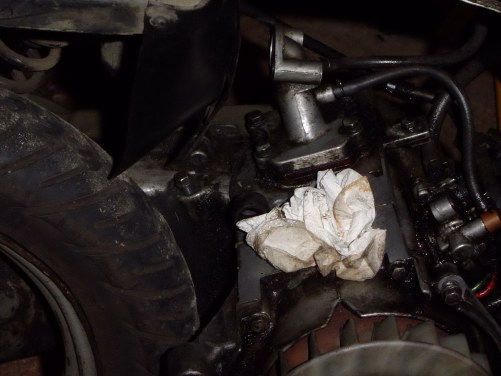
Below is the work in progress. You can see a rag in the crank case, to be sure no dirt or anything will fall inside.
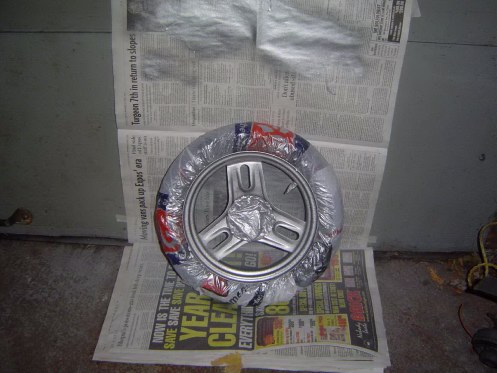
Below is the rear rim just been repainted.
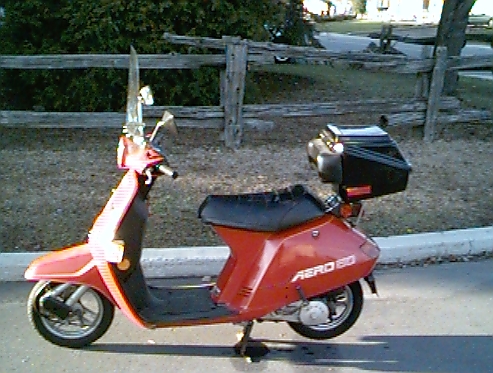
Below is the scooter completed. The muffler was also welded and painted.

So this is my story.
Update:
Here is picture of the windshield I made for my scooter. I was tired of getting bugs in the face. Man just think you are doing 35 mph and a bee is doing 30 mph and the bee hits you in the face, ouch that hurts. In the beginning I thought the windshield would add resistance, I was completely wrong. It actually causes a vacuum, and is so stable to ride. In a way it makes the scooter look a little bit more classy. Check out the pictures below.
If you are interested in making one, go to the top of the page and click on Windshield plans.
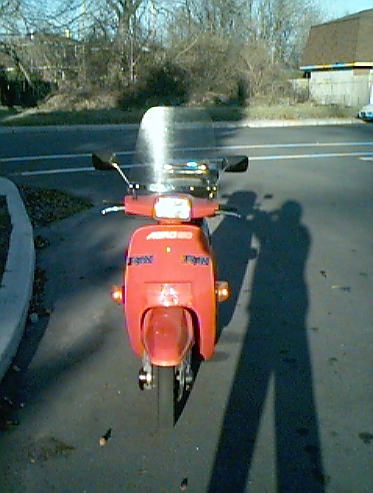
Wind shield mounted on the scooter.(Above)

"L" Shape bracket mounted on the mirror held with a U-bolt and bolted to the windshield.(Above)
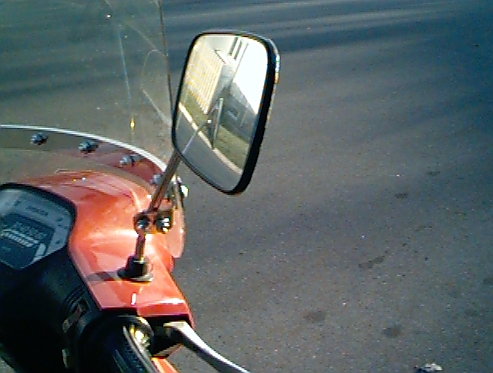
A view from the other side on how it is mounted.